How To Build A Cubby House With Kids
- Family

By Hayley Dean, ellaslist
For Christmas this year my children are getting a cubby house. It’s something that I have wanted to do from the moment they were born, but it has taken me a long time to find the right solution for us.
We live in Sydney’s Inner West, which means our backyard isn’t all that large. We do have a patch of grass, an unused garden bed (thanks to a possum that eats everything I plant) and some trees to work with but we certainly don’t have the room for anything too elaborate. For years I had thought the solution lay in the back corner of our garden as it was the most used area and made sense to put the cubby there. I did all the research into companies that made cubby houses with matching dimensions, offered all the bells and whistles and didn’t cost a fortune but never seem to find exactly what I was after.
Then out of no where this year it hit me, exactly what I needed wasn’t the Buckingham Palace of Cubby’s, what I needed was something we could all do together. And thankfully, I found the solution at Bunnings.
Go back to basics
As parent it’s so easy to project our desires onto our kids and forget that they have the greatest imaginations already! I now believe that building a cubby is not dissimilar to any other toy they have – put too much in front of them all at once and kids get so over whelmed they play with nothing.
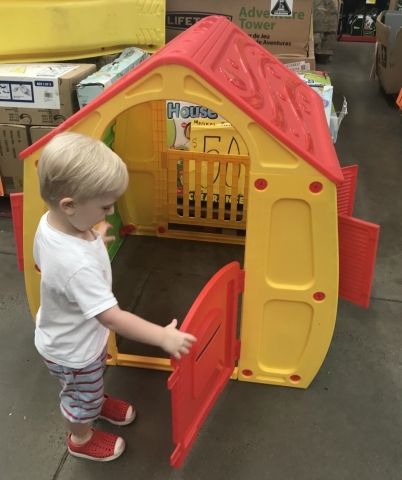
We purchased a very basic wooden cubby from Bunnings for $199. We selected this kit because the measurements were perfect for the space and it offered a somewhat blank canvas for us to work on. Bunnings also sell terrific plastic models that you can also add your own personal touch too. Plastic options are a great option for renters who can’t permanently anchor the cubby house into the ground.
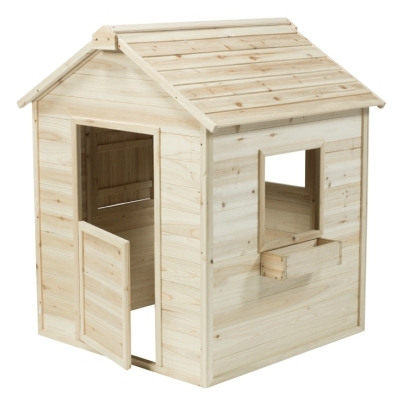
Image: Bunnings website
Include them
We all went to buy the cubby house together in early December along with a couple of matching accessories for the surrounding garden and the boys picked out the flowers they liked for the planter box. We also bought a kid’s size tool kit (the box is shaped like a truck!). We started building the moment we got home.
It is so much fun to do things like this together. You MUST let go of your desire to have everything perfect or it ain’t gunna be fun for anyone! Use this time as both a wonderful bonding and educational experience. Let them hammer or tighten the screws, paint the walls with decking oil and plant the flowers in the soil. The more you include them, the better. The dirtier you all get, the better (PSA – don’t wear your good clothes because decking oil stains!)
Decorate slowly
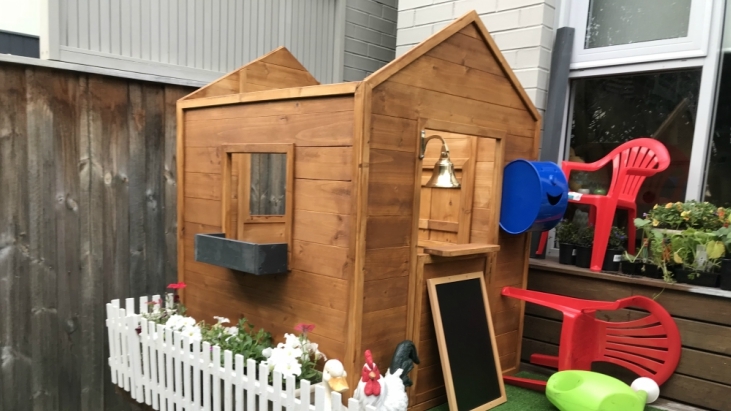
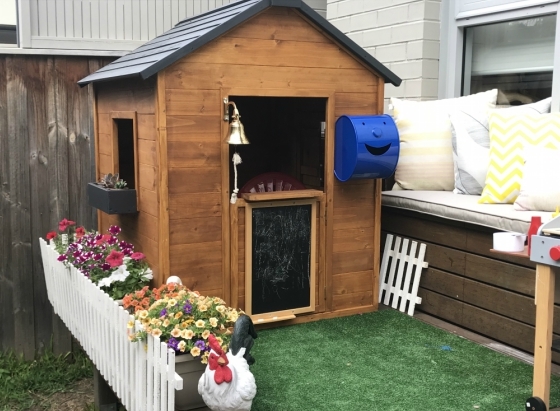
As exciting as it is, don’t buy all the little extra bits at once because you never really know how it’s all going to look until its built. We have visited Bunnings four times now to pick up a few extra items for the kids “house’; a letterbox, some chairs, more plants etc. And had a trip to Ikea to pick up a kids sized table and chairs to complement the cubby house.
There are a number of looks to go for and my advice is to let the kids decide what the dwelling is going to be. Our cubby has a swing door at the front so I attached a chalk board thinking they would surely use it like a shop but “NO MUMMY” it’s not a shop (silly me), its OUR house. They have added cushions and chairs and a poster. For a week following its build, they didn’t ask to watch TV once, NOT once. They wake up, they run outside – hooray for outdoor play! Sorry neighbours.

Build or buy
If you have a bit of handyman know-how then building a cubby will be a piece of cake. Recycled materials are popular, especially old pallets. Or head down to your local timber yard (measurements in hand) and pick up some off cuts.
Most kits come with detailed instructions too, so as long as you have a working power drill, you should be fine. In my case, it took less than an half an hour to put the frame together but a couple of days to actually build as we stained the wood to match our deck and painted the roof the same colour as our outside walls meaning we needed to wait for it all to dry first. Overall, it was super easy to do.
There are many companies out there that can do all this for you and they offer some amazing cubby house designs to boot.
Just another point to note here; some councils have restrictions on cubby houses so be sure to check you’re the website before commencing your built It generally involves the height of the cubby and whether it may impede on the neighbours' privacy.
And finally and most importantly,
If you build it, will they come?
My friend bought, and had professionally installed, this amazing cubby house for her kids. It costs thousands. It has everything, a slide, a rock wall, and a multiple layered security system with technologically advanced lighting. This thing is amazing. It basically takes up the entire backyard. Her kids used it passionately for about a week and then….barely touched it since. She is now stuck with this unused monster.
I guess my advice here is that kids are kids and I can’t tell you if they will play with it or not. What I can suggest is that you buy a cubby that complements your home/backyard and one that you can easily live with or work around both now and in the future.
In the end, we built our cubby house on our deck. It was totally unused space for us; in fact, we were going to rip the deck out but it’s actually really added something special to our backyard and our kid’s lives. It inspired a complete backyard revamp too. Best of all, I can sit at the kitchen table working away and still keep an eye on them. I can’t believe we didn’t build it years ago!
We’d love to see some photos of your cubby house creations. Upload them on our Facebook page and tell us your own cubby house tips!
Reviews